Neal Grosskopf
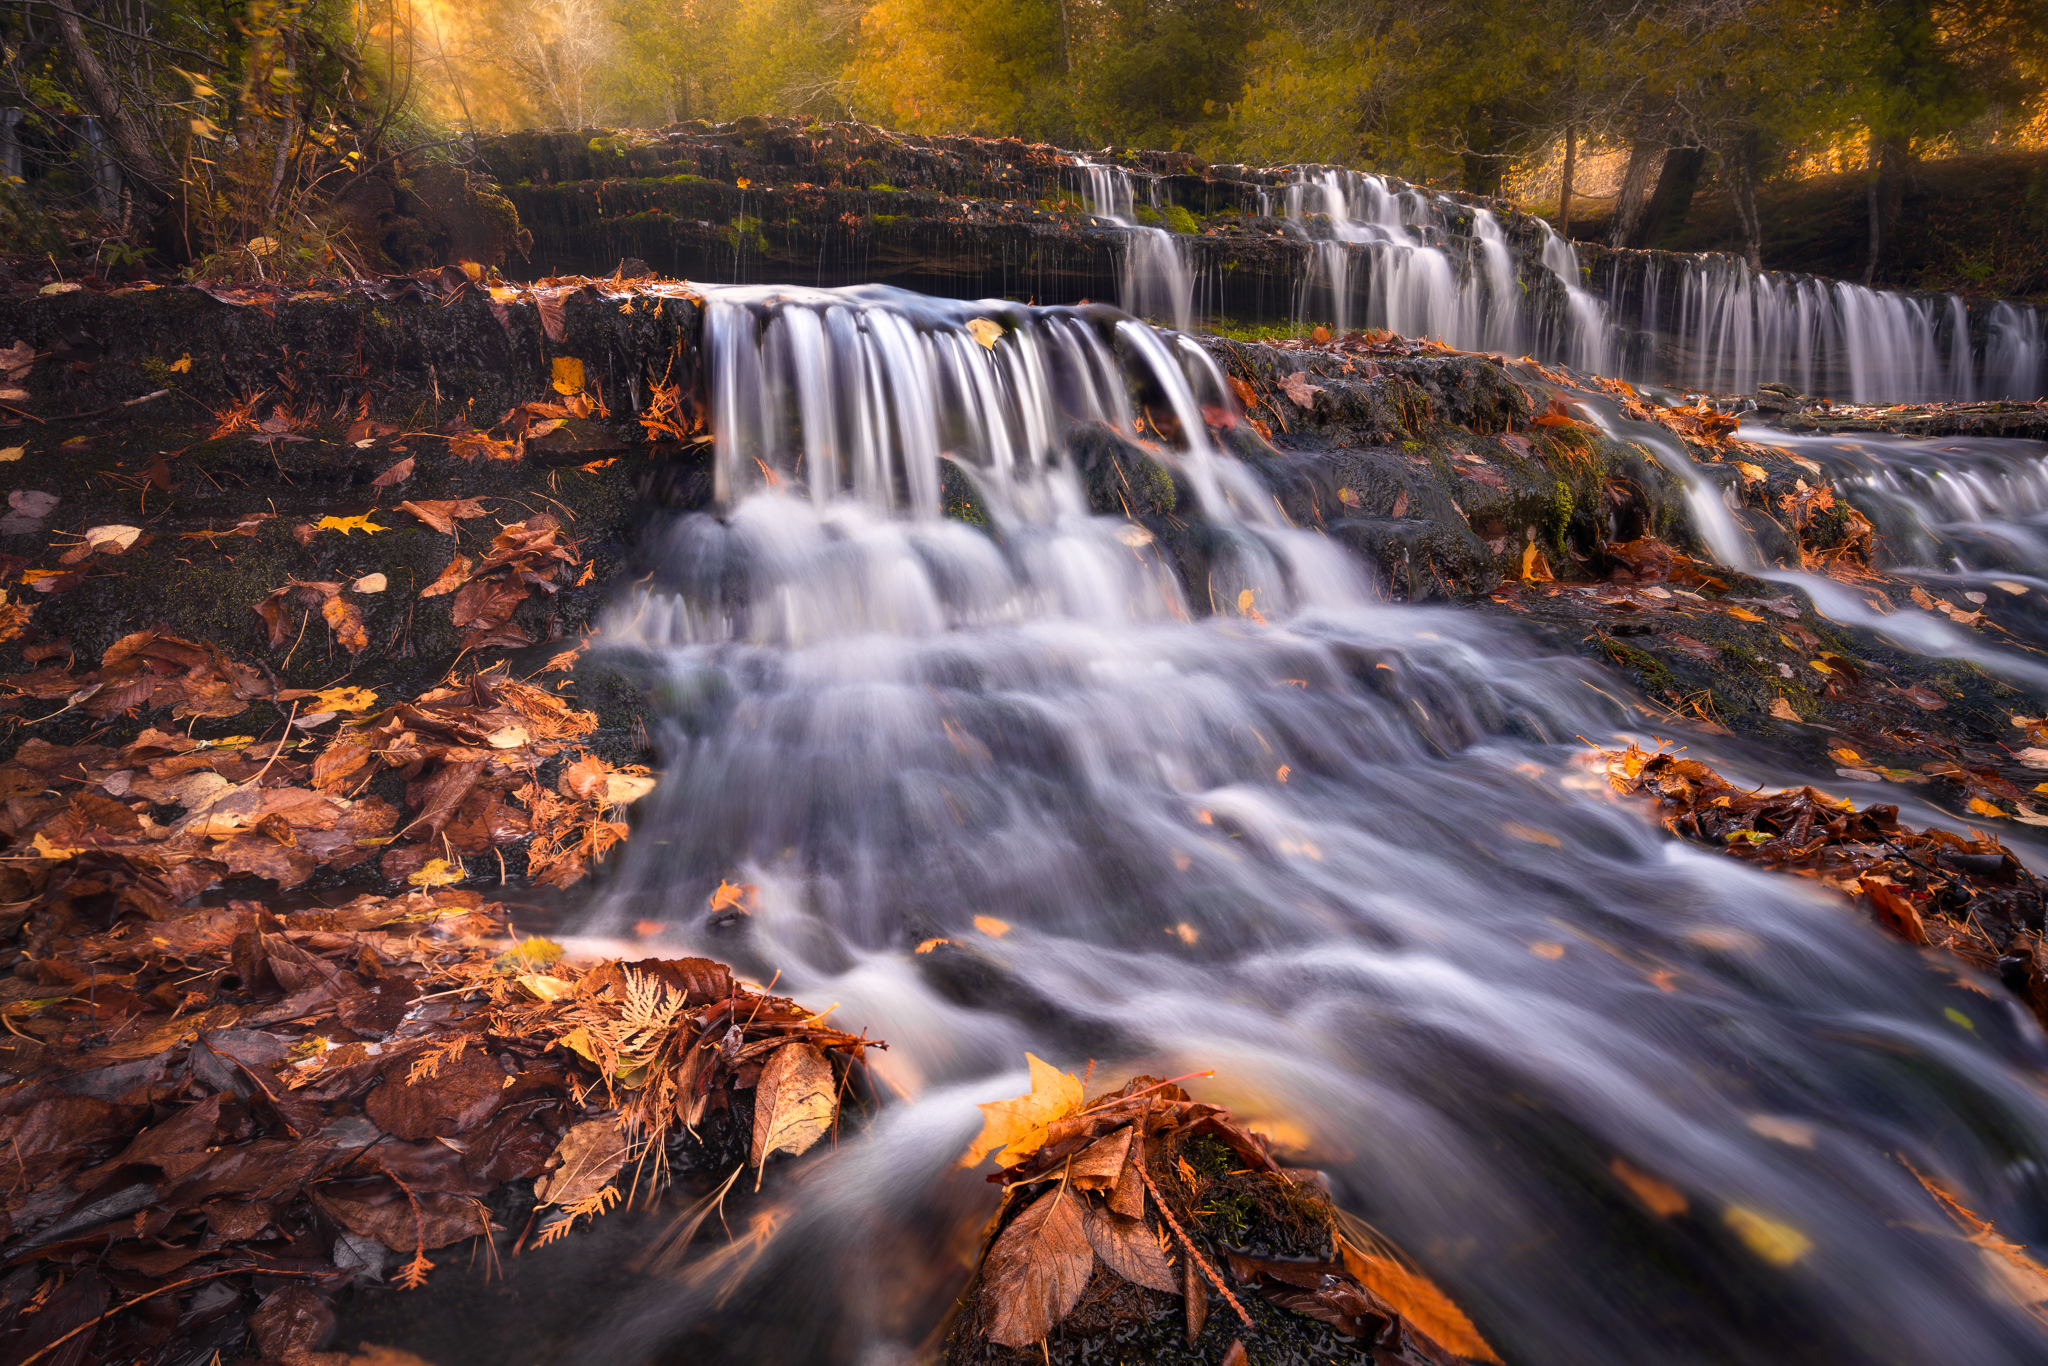
Au Train Falls, Upper Michigan
Before & After


This particular shot is one of my favorites I’ve ever taken mostly because of the way the processing of it turned out (I feel it looks most like the photographer’s photos who I admire), but I also think I got the angle/composition of it pretty good.
Location
Taken at Au Train Falls in Upper Michigan which are only a short drive from Munising, MI. I was staying up here for a fall colors trip and on my way home stopped at Au Train Falls. The falls have a dam behind them that regulates the amount of water that will be going over the falls so it may vary depending on the time of the year. To access them you pull off on to a gravel and drive a short distance down a hill. It isn’t necessarily a park but you are allowed to visit them. I would recommend bring some rubber boots along if you visit as it opens up the possibilities for different angles of shots you can get if you’re able to walk around in the shallow water.
Composition
When I arrived there were a few other people walking around near the falls. Since I had my rubber boots with me, I headed into the shallow water and scouted out compositions. The sun was starting to get low in the sky so I had to find angles where the sun didn’t create too much of a reflection in the water. I had my circular polarizer with me to deal with that as well. The cool thing about Au Train Falls is they are these very long and wide falls and if you moved 5 feet in any direction it totally changes the photo. There’s so many great photos to get here. It’s really one of the most photogenic waterfalls I’ve shot at and I will post a few more photos from the trip here later.
I took this shot towards the end of my shoot as it was one of the few angles left that the sun wasn’t overpowering. I got down real low and put a couple leaves in front of my lens for a foreground element. Then I turned my camera at an angle to lead the water into the frame. Then, I took 3 bracketed shots at -2ev, 0ev & +2ev. I also took another set like this with the focus set on the foreground so I could focus stack it later.
EXIF Information
Post Processing
As you can see in the before and after, this photo is heavily post-processed. It’s been awhile since I last processed it, but I believe I started in Lightroom, then exported for Aurora HDR. After that brought it back to Lightroom and sent it to Photoshop where I did most of the edits. Then, I wrapped it up in Luminar. I also used Raya Pro to add an orton effect. One of the few things I use Raya Pro for now.
Software Used
- Aurora HDR
- Lightroom
- Luminar
- Photoshop
- Raya Pro
Techniques Used
- Focus Stacking
- High-Dynamic-Range